In this knowledge repository, we will see how to obtain the answer from an API, from which we will obtain the respective IDs associated with a project in Azure DevOps.
Primero
To get started, we'll need to add the sources of the data, to do what's described below:
1.Click at the top where “Get Data” appears and look for the “Web” option.
2. Then, in the “Basic” option, we will paste the following where the URL appears:
Then we'll hit “OK”. It may ask us to enter credentials, which are entered at the time they are requested as basic authentication.
3. When you add that source, the “Power Query Editor” tab will open, showing the following:
4. Click on the value in the column that says “List” in yellow, this will expand the result.
5. Once the previous step is done, it should look like this:
When it looks like this, right click on the “List” column and click on the “To Table” option. It will give us the option of selecting delimiters and how to handle extra columns, leaving default values and clicking “OK”. We give ourselves the option of selecting delimiters and how to handle extra columns, leaving the default values and clicking “OK”.
6. After the above, we will have something like this:
7. Next, click on the arrows shown next to column 1 on the right side, select the “id” value only and “OK”.
8. We'll rename the column to Id and the table to “GetID”.
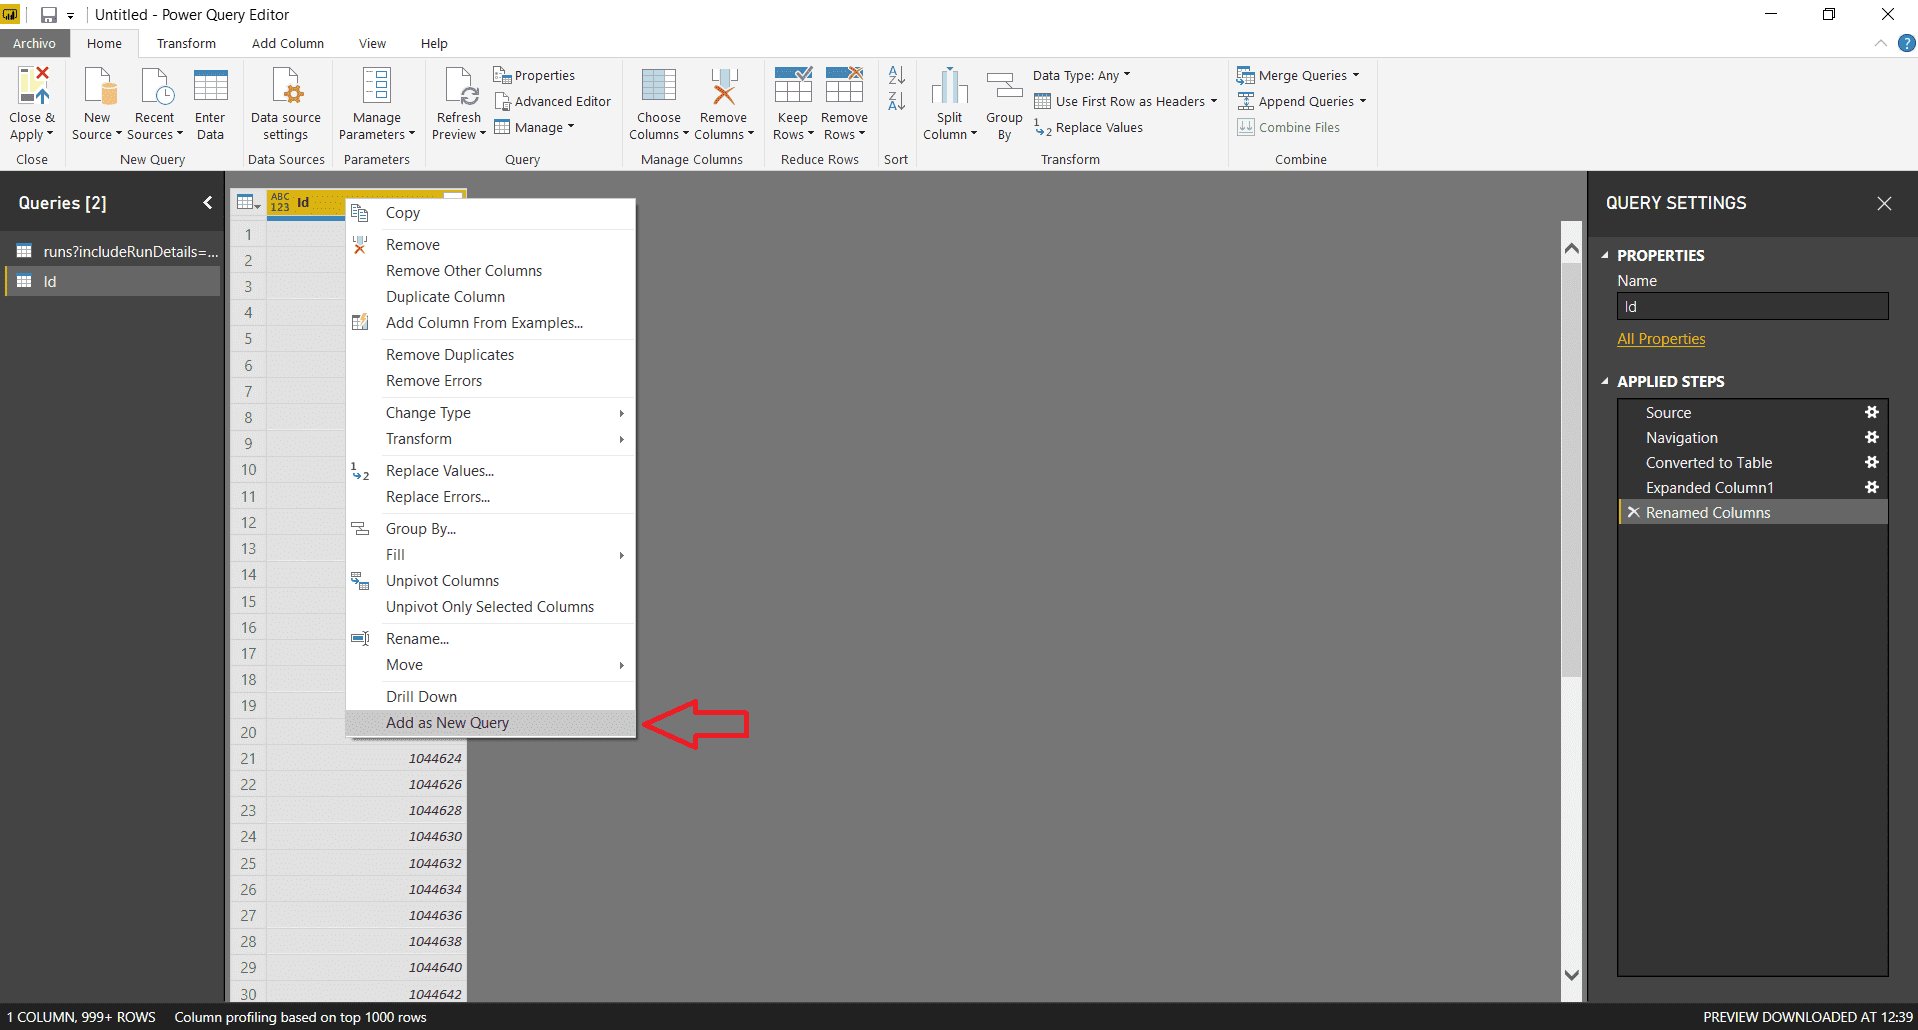
9. To finish this step, we will right-click and give you the option to “Add as New Query”.
10. We will have the following list with the IDs obtained from that API:
Segundo
By having the IDs in a list, it will allow us to use them as parameters and then paste them to the API.
To pass them to parameters, you must do the following:
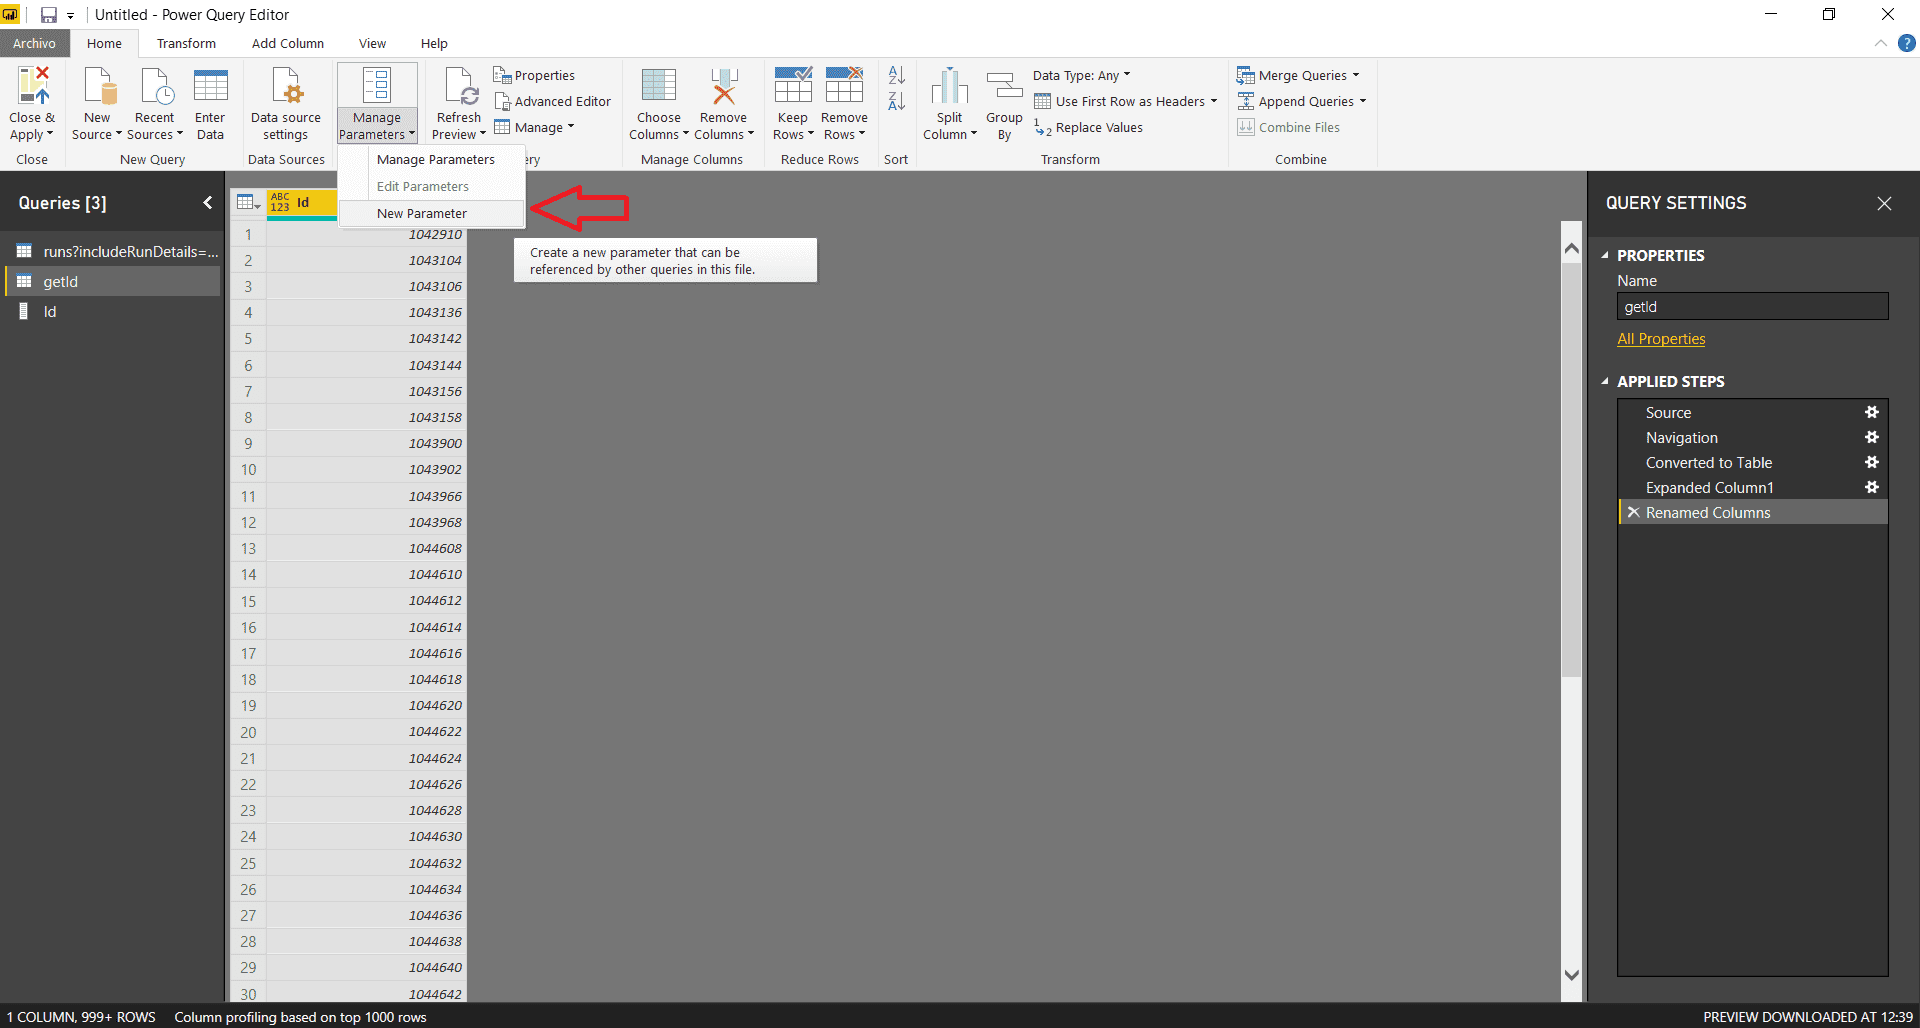
1. Click on “Manage Parameters” in the “Home” tab of the “Power Query Editor”, then on “New parameter”.
2. Fill in with the data as shown in the following image:
Where the selected query is the one we had previously created with the lists, leaving it as text and the initial value the first value it brings.
Thirdly
To be able to paste to the API with the IDs we brought, we have to add a new data source, we select JSON. We can load any JSON, then the properties will be changed to load what you actually need.
1. When loading the JSON, we'll have to click on the gear that appears on the right side of the screen:
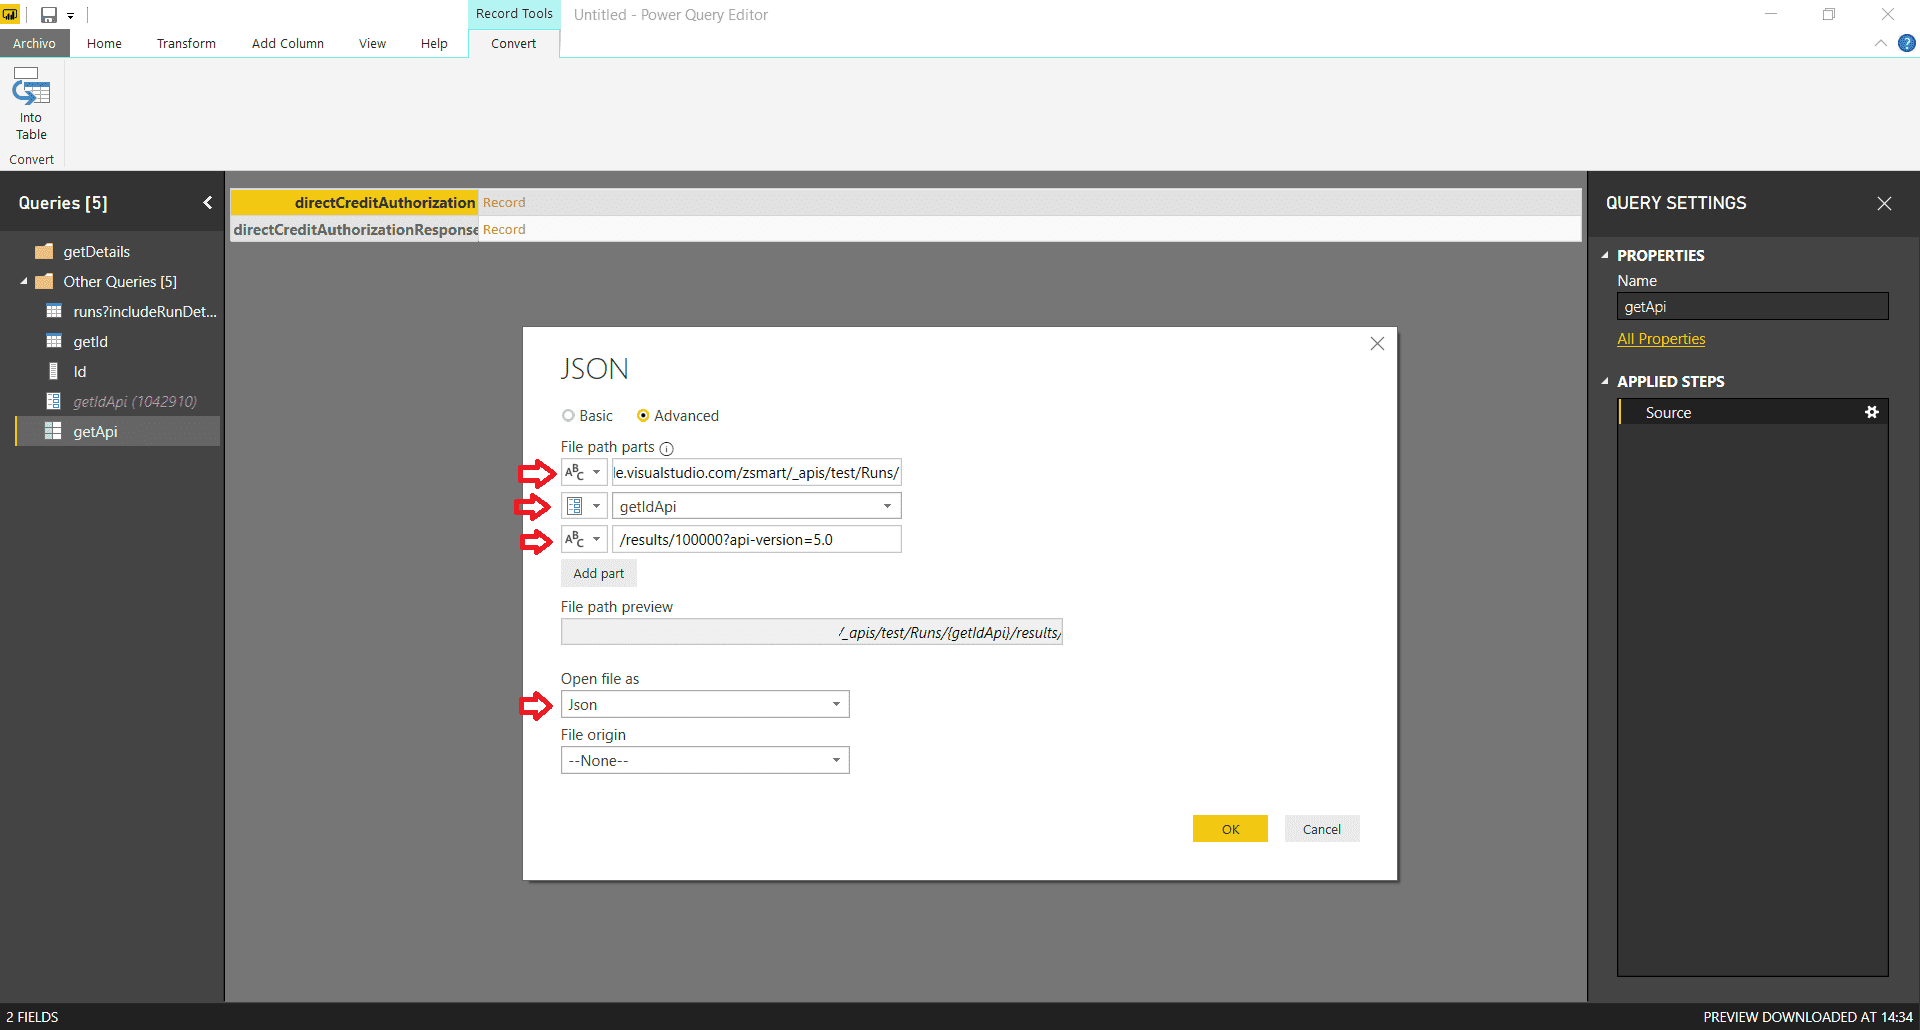
2. We click on “Advanced” and fill in as shown in the image:
The first part of the URL is added as text, then the ID as a parameter, which was created earlier and then the last part of the URL as text.
3. We will get an error, but to correct it, we have to right click on the table that was created for this case, in my case I put “GetAPI”. And we turned to the “Advanced Editor”. Where “File.Contents” appears, change to “Web.contents” and press “OK”.
4. After the above, we will get an error like this: “Formula.Firewall: Query 'GetAPI' (step 'Source') references other queries or steps, so it may not directly access a data source. Please rebuild this data combination.” To correct it, go to File, “Options & Settings”, “Options”, go down and select Privacy. And finally, we selected the option “Ignore the Privacy...”.
5. We refresh the view by moving to the tab or saving. And there shouldn't be something like this:
6. As was done in the previous steps, we converted to a table.
7. Now, go to the “Transform” tab and click “Transpose”.
8. Then in the same “Transform” tab, we select the “Use first row as headers” option.
9. As was done in the previous steps, we are going to expand all the columns that allow us to expand, leaving in the end something like this:
10. Then we will create a function, by right clicking on the same table that we were just working on, we give it a name and “OK” (In my case, I called it GetDitails).
Cuarto
To continue on this journey, we return to the table we call “GetID”.
1. We go to the “Add column” tab and select the “Invoke Custom Function” option
2. Fill it with the function we created earlier and with the ID value that we want.
3. Right click on the new “GetDetails” column and click “Remove errors” to avoid columns that are not accepted.
4. Finally, as we did before, we expanded as many columns as possible. Leaving something like this:
5. We click “Close & Apply” to save the changes in “Power Query Editor”.
Fifthly
To finish this, we must establish the relationship between the ID list and the ID of the table that is composed of “ID + RESPONSE”.
1. We click on the “Manage Relationships” tab, and give it a “New” (If there are some by default, delete them).
2. We leave it as shown in the following image:
After that we give it OK.
Outturn
After you have followed all these steps, you can update the IDs that are needed and along with that, the API responses.


.png)
